
- Create your own dehumidifier at home with 3 different ingredients you can find in your kitchen.
- They’re natural, simple to create, and are easy on the pocket as no electricity is needed to put them to work.
Time to say goodbye to humid air, allergies, and dust mites!
For those of you who don’t know, a dehumidifier is an appliance that helps with trapping moisture and dries out the air in your home. Yes, humidity happens inside your home too.
Most of the time, high level humidity could trigger you or your family members’ allergies and the pollen-filled-humid air is bad for your health too. This is because dust mites, pollens, and molds thrive in humid conditions.
Which is why having a dehumidifier in your home could help you prevent pollen and dust as well as eliminating invaders like cockroaches and spiders. Not to mention, lower humidity levels may also cool off your home and reduce your air conditioner use, and what comes with less air conditioner use? Lesser electrical bill!
However, one downside to getting a dehumidifier is that they fall on the higher side of the pricing range. Though, that doesn’t mean you can’t DIY them as temporary solutions while you save up for an actual one.
So, remember how we brought our kitchen to the garden? Similar thing! The versatility of your kitchen ingredients are endless. This time, you can turn your kitchen ingredients into your temporary, natural dehumidifier!
Take a look at what you can use and how you can do them.
1. Rock Salt
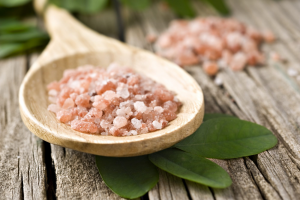
Image Source Eliane Smiles
If solving your moisture problem is something you like to do inexpensively, then rock salt is the way to go.
It’s a surprisingly little known fact that rock salts can be used to absorb moisture from the air. They’re hygroscopic, meaning they have the ability to trap water molecules within their environment. Which brings us to the fact of rock salts being one of the best kitchen ingredients to use as a dehumidifier.
You can place your rock salt dehumidifier at large spaces such as your living room, bedroom, kitchen, or even at your basement if you own one.
Here’s what you’ll need:
- A bag or two of rock salt
- 1 small sized bucket
- 1 medium sized bucket
Preparation:
Step 1
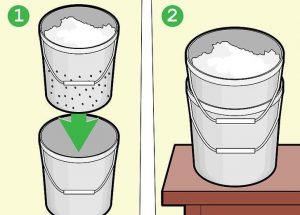
With the small-sized bucket and drill small holes into them. Holes should be drilled by the sides and at the bottom. You then insert the bucket inside the medium-sized one. Note that the medium-sized bucket’s condition should remain as it is.
Step 2
Next, pour inside the rock salt and fill it up to the brim of the bucket. Once that is done, place it at the area of your home you would like to dehumidify
Step 3
The rock salts will do it’s work by absorbing the moisture in the air which the collected water will drip through the holes and into the other bucket. Also, notice how the rock salts will blackened over time too. That’s how you’ll know it’s working.
Step 4
Once it’s filled, empty both buckets and repeat step 2.
Making a rock salt dehumidifier is also a fun way for you to teach your kids at home about the properties of salt. It’s like a mini science experiment!
2. Baking Soda

If you have not realized already, baking soda might be one of the most versatile kitchen ingredients you have at home. Baking soda too has the scientific component of being hygroscopic. Which helps in absorbing moisture, unpleasant odors, and reducing the dust mites.
However, a baking soda dehumidifier only works in small areas. Which is why it’s the best option for you to place them in your closet, shoe racks, kitchen cabinets, and other small spaces that are often closed and accumulate dust mites easily.
Here’s what you’ll need:
- A box of baking soda
- A small container
Preparation:
Step 1
First, you would need to grab the empty container and place it in front of you.
Step 2
Second, fill up the baking soda inside the container. Then, place it at the place where you’d like to dehumidify.
Step 3
Wait for the baking soda to do its work and you’ll know it has once it hardens. You then replace it with a new batch.
Step 4
There’s no step 4. You’re done.
Yes folks. It’s exactly that simple. All you need to do is just fill it up in a container with baking soda. Life has never been easier with this DIY dehumidifier.
3. Non-Dairy Coffee Creamer
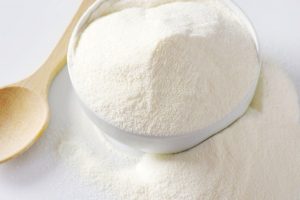
Here’s what you’ll need:
- A packet of non-dairy coffee creamer
- A bowl or a small container
- Coffee filters
- Stapler
Preparation:
Step 1
If you’re placing it in small spaces, opt for the small container. Just like the baking soda, fill up the container with the coffee creamer, place it at the desired place, and you’re basically done. Swap out with a bowl if you’re planning on placing it in open spaces.
Another option if you’d like to go the extra mile would be;
Step 1
With the coffee filter, pour in the coffee creamer until it’s half full. Repeat this for as many coffee filters you have or as many as you want.
Step 2
Seal the filled coffee filters using the stapler. Once you’re done with the rest of the sets, place them around the corners of your house. This coffee filter method allows you to create your own mini dehumidifier packets for your home.
The coffee creamer dehumidifier works similarly like the baking soda dehumidifier. You’ll know it’s working once the ingredient is hardened. Which all you have to do after is switch them out with a new batch.
So, there you go. Three different low cost DIY humidifiers you can create at home. Not to mention, they’re completely natural, non-toxic, and require absolutely no electricity.
Pick your choice and let us know how it goes in the comment section down below! Our favorite would be the rock salt *wink*.
