- Transform your blank walls into captivating masterpieces
- No more plain and boring walls in your abode!
Tired of feeling like your walls are giving you the “same old, same old” stare? Well, it’s time to give those dull surfaces a much-needed makeover and inject some pzazz into your living space! Prepare to embark on a wild and wacky adventure into the realm of DIY home decor projects that will make your walls shout, “Wow, you’ve got style!” We’re about to dive headfirst into a world filled with chalk wall calendars, wall string art that’s practically strung out on awesomeness, and wall art in clipboard frames that’ll make you say, “Clipboard, you’ve never looked so fly!” Buckle up, we’re about to unleash your inner Picasso and turn those walls into a jaw-dropping gallery of mind-blowing magnificence!
1/ Chalk Wall Calendars: Organise and Dazzle!
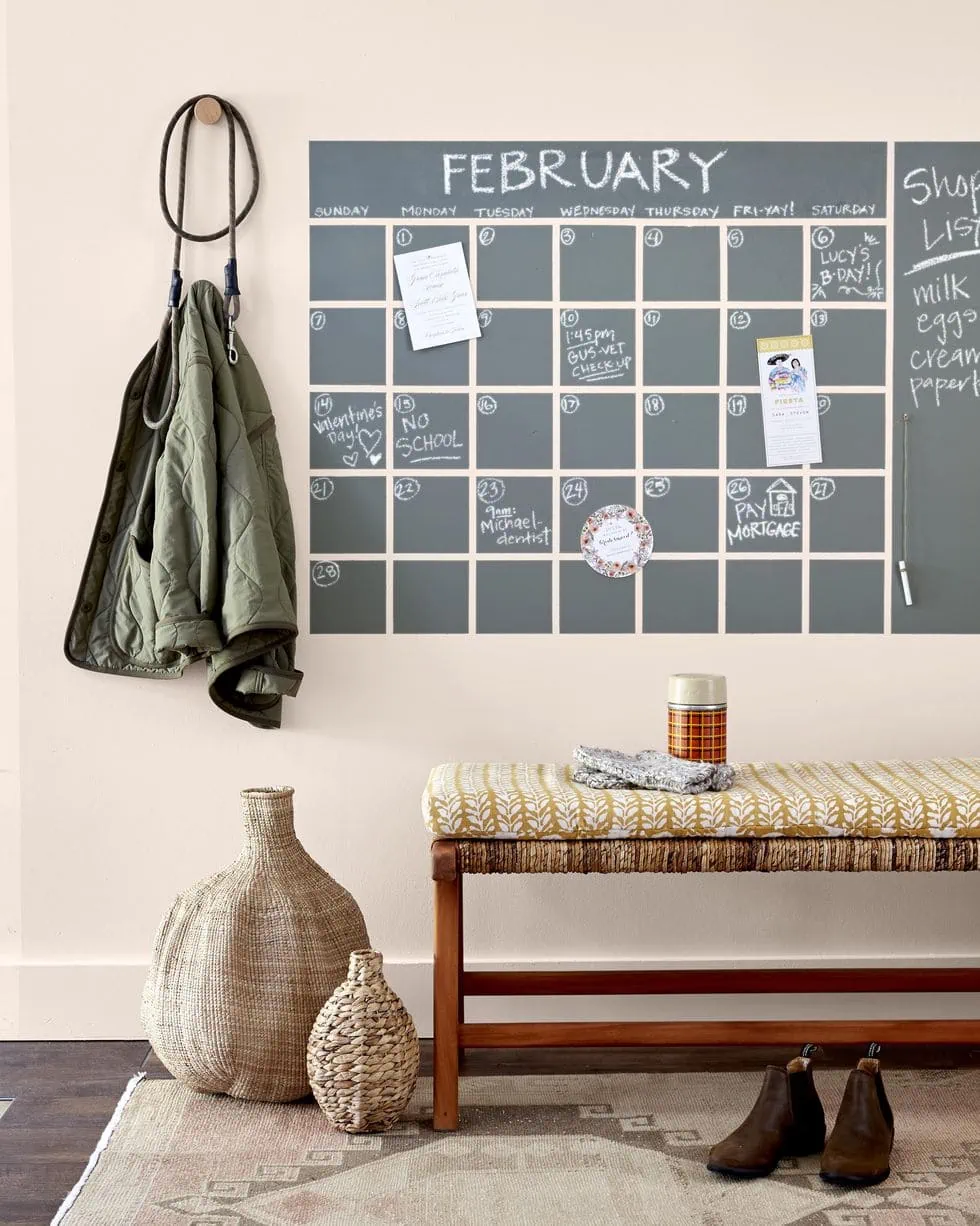
If you find yourself juggling more calendars than a circus performer or drowning in a sea of post-it notes like a befuddled office worker, fear not! The superhero organisation has arrived, and it goes by the name of the chalk wall calendar. This ingenious creation not only rescues you from appointment mayhem but also transforms your wall into a magnificent masterpiece that’ll make visitors gasp in awe. It’s like having a practical sidekick and a show-stopping diva all rolled into one. Say goodbye to calendar chaos and hello to the superstar of wall decor!
All you need are:
- A large, empty wall space
- Chalkboard paint
- Painter’s tape
- Chalk or chalk markers
First of all, you have to clean and prepare the wall surface. Then, tape off the area you want to transform into a calendar. Next, apply several coats of chalkboard paint, following the manufacturer’s instructions and allow the paint to dry thoroughly. Once it dries, remove the painter’s tape and voila! Your very own chalk wall calendar is ready for action! You can use chalk or chalk markers to write down your schedule, add fun designs, or leave motivational messages.
Not to forget! A pro tip just for you, get creative with colours, patterns, and shapes to make your calendar truly unique. You can even incorporate different sections for each family member or add a space for notes.
2/ Wall String Art: Weaving Wonders!
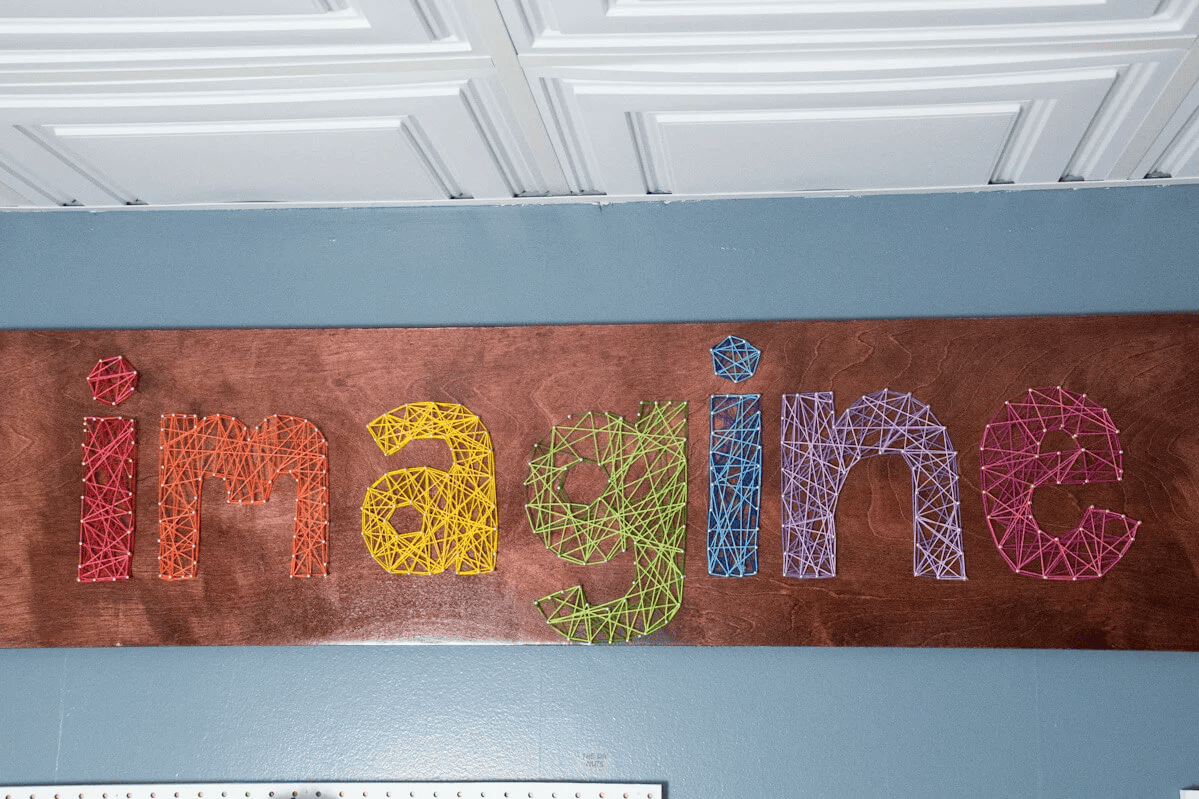
Calling all aspiring string sorcerers! If you’re ready to wield your DIY wand and conjure up some jaw-dropping visual enchantment, then wall string art is your ticket to becoming a bona fide wizard of creativity! Armed with a handful of materials and a sprinkle of patience (and maybe a dash of magic), you’ll weave strings of pure wonder that will have your guests gasping, “Is this witchcraft or just an incredibly talented human?” Brace yourselves for a world of mesmerising designs that will make your walls the talk of the town. Get ready to unleash the magic and let your string art skills cast a spell of awe on all who behold it!
Here’s some of the materials that you need!
- A wooden board or canvas
- Nails
- Hammer
- Colored string or embroidery floss
- Scissors
- Design template (optional)
Firstly, decide on your design or pattern. You can find inspiration online or create your own. Next, if you are using a design template, attach it to the wooden board or canvas. Then, carefully hammer the nails into the board along the outline of your design, leaving a bit of the nail exposed. Once all the nails are in place, remove the template (if used). You can then tie one end of the string to a nail and start weaving it back and forth around the nails, following your desired pattern. Continue weaving until you’ve covered the entire design area and once you’re satisfied with the string coverage, tie off the string and trim any excess. Lastly, all you need to do is just hang your wall string art masterpiece and revel in its beauty!
Good thing is, you can experiment with different string colours and thicknesses to create striking contrasts and texture. You can even create multiple pieces and arrange them in a cluster for an eye-catching gallery effect!
3/ Wall Art in Clipboard Frames: Showcase Your Creativity!
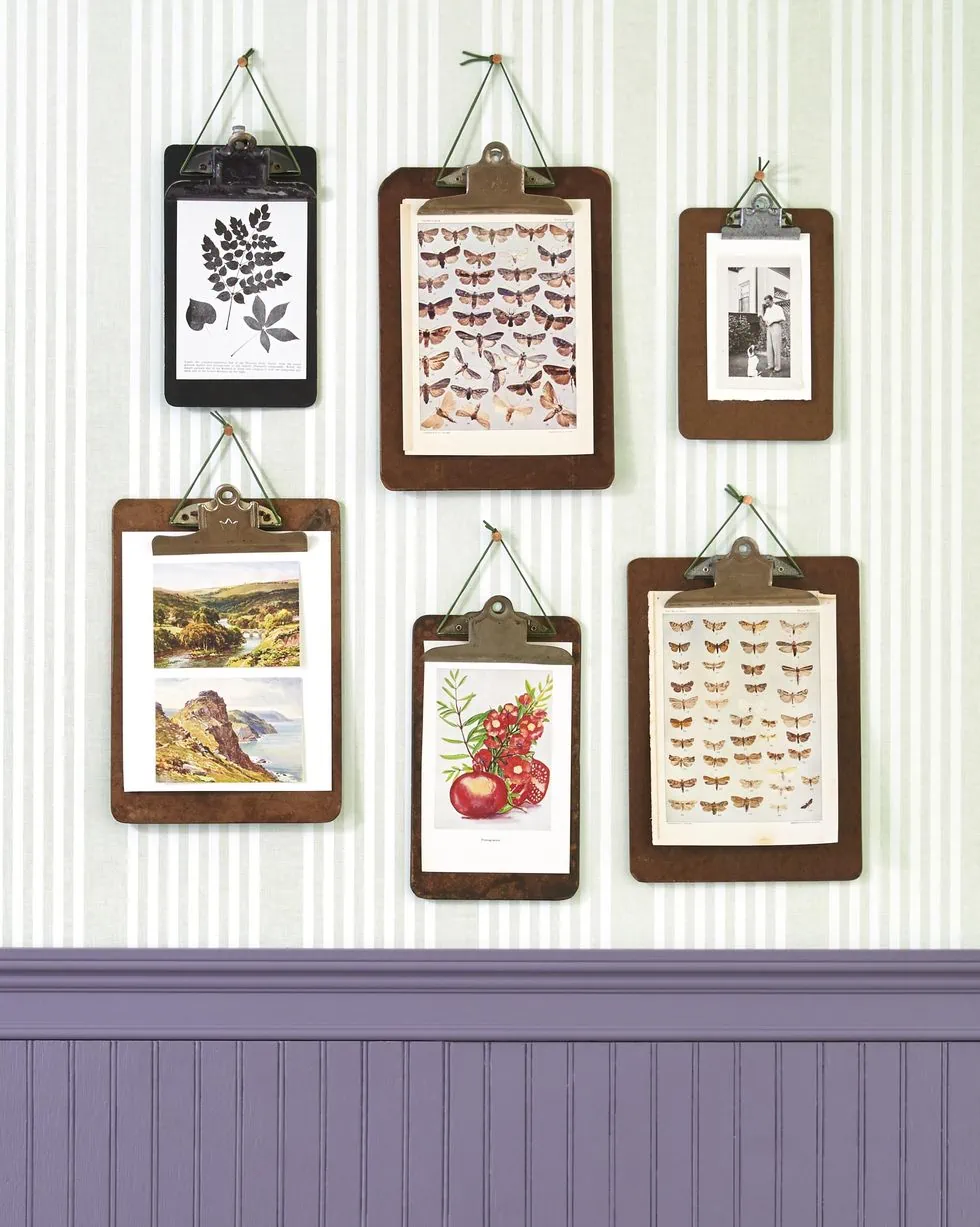
Listen up, art aficionados! Are you tired of being trapped in a static gallery where the paintings stare back at you, never changing? Fear not, for we present to you the magical solution to your art woes: clipboard frame wall art! It’s like having your very own art exhibition that’s constantly evolving, making your walls the envy of all museums. With the power of clipboard frames, you can effortlessly swap out your artwork faster than a magician’s disappearing act. Talk about flexibility! Plus, it injects a healthy dose of creativity and whimsy into your space, making your guests go, “Who needs a ticket to the Louvre when we’ve got this masterpiece right here?” So grab those clipboards and let the artistic adventure begin!
You only need these 4 materials:
- Clipboard frames (available in various sizes and materials)
- Art prints, photographs, or illustrations
- Scissors
- Double-sided tape or adhesive putty
First step, choose your clipboard frames based on your preferred size and style. Then, select the artwork you want to display. It can be your own creations, prints, or even pages from your favourite magazines or books. Next, trim the artwork to fit the size of the clipboard frame. After that, open the clip on the frame and slide the artwork inside, securing it in place. Now, you can hang the clipboard frames on your wall, arranging them in a visually appealing composition. Great thing about this DIY decor is, whenever you feel like changing up the display, you can just simply remove the artwork and replace it with something new!
Side note! You can mix and match different frame sizes, materials, and artwork styles to create an eclectic and dynamic display that reflects your personality! Sounds fun, right?!
Make Your Walls Go ‘Wow!
Prepare to witness a miracle unfold before your very eyes, my friends! With the power of these DIY home decor projects, you can bid farewell to those walls of doom and usher in an era of wall wizardry! Say “adios” to drab and embrace the fabulousness that awaits. So, dust off those tools, unleash your imagination, and get ready to transform your walls into dazzling masterpieces that will make Picasso himself green with envy!
Click the link below for more awe-inspiring content!
JAZZING UP FURNITURE: UNLEASH YOUR INNER PICASSO!
